
Missions
IRON NEST Mission 3 Walkthrough
Pre-plan the opening counter-battery sequence before the first impact starts the hostile timer.
Evidence map reviewed: 2026-08-17
The first-impact trigger, observation workflow and pre-staging sequence are shown in release-version gameplay. Community sources are used only for recovery context.
Mission 3: prepare before you reveal yourself
Mission 3 is the campaign's counter-battery problem. The release-version briefing states that hostile counter-battery timing begins when your first shell lands. That makes everything before the first impact a protected planning window.
Quick answer: do not use the first shot to begin thinking. Plot observations, prepare cards, assign both barrels and stage ammunition before the opening impact starts the hostile response. Keep the map symbol glossary nearby for observer/target roles and use the broader counter-battery guide when the problem continues after the opening sequence.
Your objective is not merely to shoot quickly. It is to move as much thinking as possible before the timer: plot the IRON NEST, place observation assets, solve known artillery positions, build firing cards, requisition ammunition and assign loads to both barrels.
Step 1: build the observation map
- Copy the current IRON NEST coordinate from the briefing.
- Place every named observation asset before drawing target lines.
- Keep the observer identifiers attached to their coordinates; later bearings are meaningless without the correct origin.
- Plot each reported bearing, distance or second observation exactly as stated.
- Mark the supported intersection/position as a hostile artillery candidate.
- Keep uncertain candidates visibly separate from confirmed batteries.
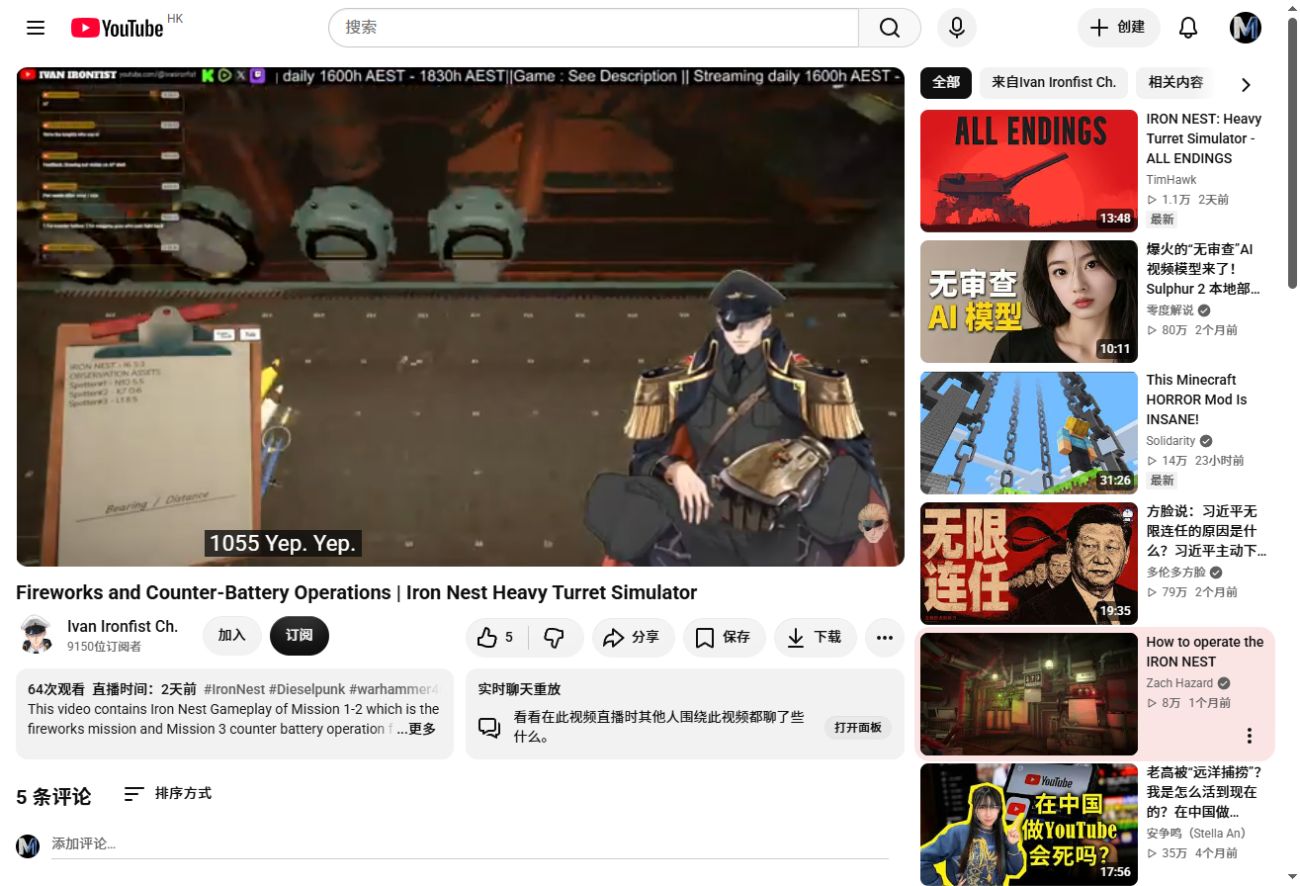 123
123- 1Mission feed: confirm that the counter-battery timer starts after the first impact, not when plotting begins.
- 2Clipboard: preserve the IRON NEST coordinate and all observer coordinates before drawing.
- 3Blue observer marker: each reported bearing must start from its matching observation asset.
Release-version gameplay frame. Broadcast graphics are part of the source video; numbered markers are this site's editorial overlay. Open the source at 1:57:33
Step 2: prepare the opening sequence
Before firing, make one card per intended target and keep the card, shell, charge plan and barrel assignment together.
- Solve every target supported by the initial briefing.
- Requisition enough appropriate shells and charges for the opening sequence.
- Load or stage both guns only after their cards are internally consistent.
- Arrange target order to minimize unnecessary traverse while preserving priority.
- Keep reconnaissance available for batteries that are not yet located.
- Run the firing checklist on both barrels; a fast wrong shot starts the enemy timer without removing a threat.
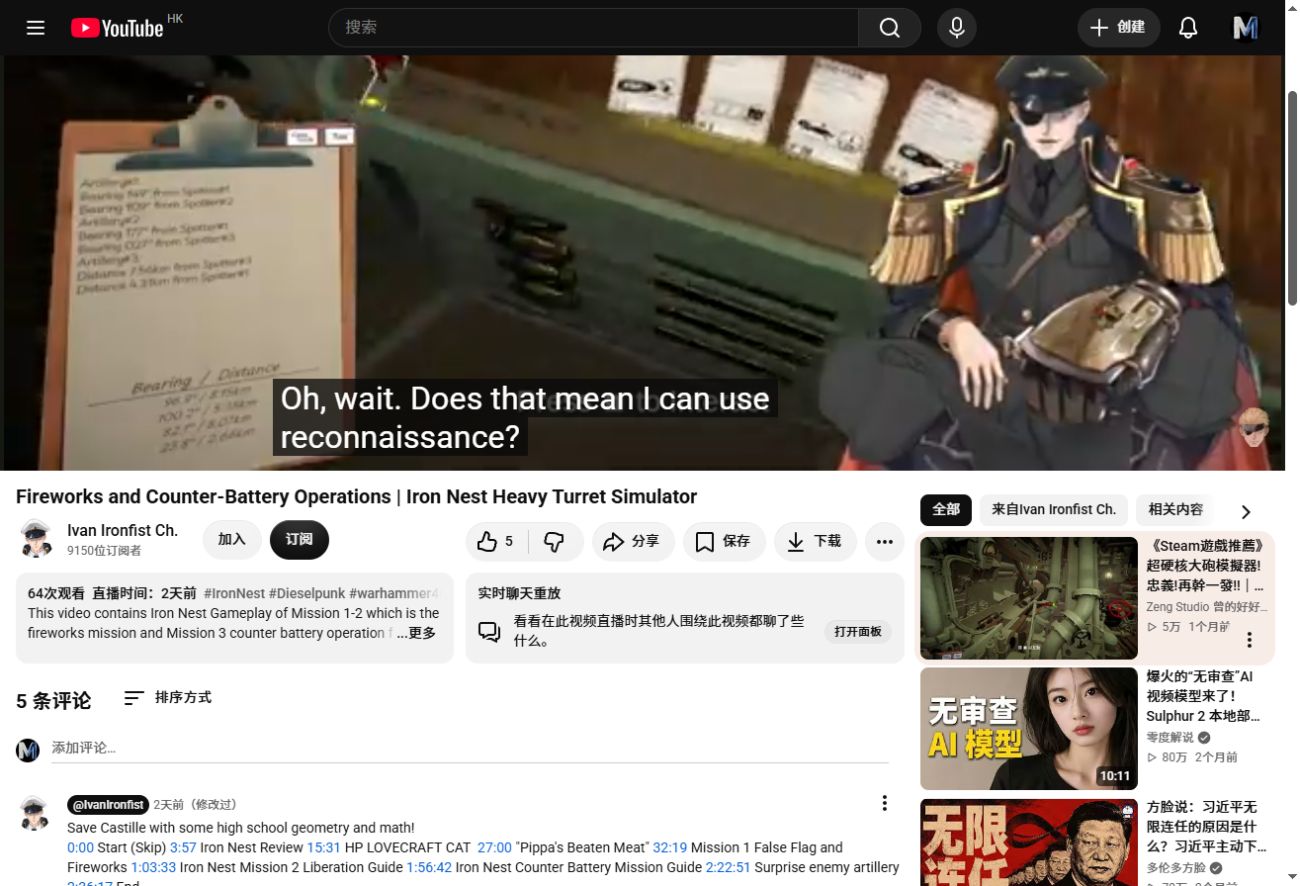 123
123- 1Target notes: keep every observer statement and its solved firing data legible under time pressure.
- 2Requisition and ammunition cards: stage the intended shells and charges before the first impact starts the clock.
- 3Barrel plan: decide which gun owns each card so loading, elevation and traverse do not become mixed.
The source frame shows the player staging information and support before the opening impacts. The streamer avatar and captions are not game UI. Open the source at 2:03:55
Step 3: execute under counter-battery pressure
- Fire the first confirmed solution and begin the prepared follow-up immediately.
- Read the latest mission feed after every impact; the priority can change when a new hostile battery is revealed.
- If an unlocated artillery threat appears, pause lower-priority work and use reconnaissance or new reports to establish it.
- Destroy confirmed counter-battery threats before returning to ordinary targets.
- If survival pressure becomes unacceptable, use the documented Emergency Move workflow, then relocate the IRON NEST marker and invalidate every old firing line.
- Continue until High Command confirms that no hostile artillery threat remains; “one target disappeared” is not the same as mission completion.
Mission 3 troubleshooting
| Symptom | Likely cause | Recovery |
|---|---|---|
| The timer starts and the second gun is not ready | The opening shot was fired before staging cards, shells and charges | Prioritize the confirmed incoming battery; on retry, move all safe preparation before the first impact. |
| Two observation lines do not meet exactly | Report uncertainty, wrong observer origin or transcription error | Verify observer IDs and bearings, then treat a near crossing as an uncertainty area and confirm it with recon. |
| The mission says artillery remains but the map looks clear | A later/hidden battery has not been confirmed | Read the latest feed, use reconnaissance and preserve newly revealed markers instead of blind firing. |
| A prepared shot misses after Emergency Move | The firing line still uses the old IRON NEST position | Move the IRON NEST marker first, then rebuild bearing, range, charge and elevation. |
| The wrong shell is already loaded | Loading began before the target/card pair was locked | The gun cannot be unloaded; use the other barrel for the urgent target or preserve the load for a valid later target. |
This page intentionally omits the recorded coordinates and firing numbers. They prove the workflow existed in the release build, but they are not a reliable answer key for another run or patch.
Mission 3 versus the general counter-battery guide
Use this Mission 3 walkthrough for the campaign sequence, opening preparation and mission-specific failure states. Use the counter-battery guide for the reusable locate-fire-assess-move loop, and the scout plane guide when reconnaissance is the missing part of that loop.